Exporting your data
tip
We believe that your data is truly yours. That's why the Export Data feature is available to all users, including those on the free plan. We want you to have full control over your financial information, no matter which plan you choose.
Exporting your data from the app is simple and allows you to keep a backup or share your financial information with others. Here's a step-by-step guide to help you export your data:
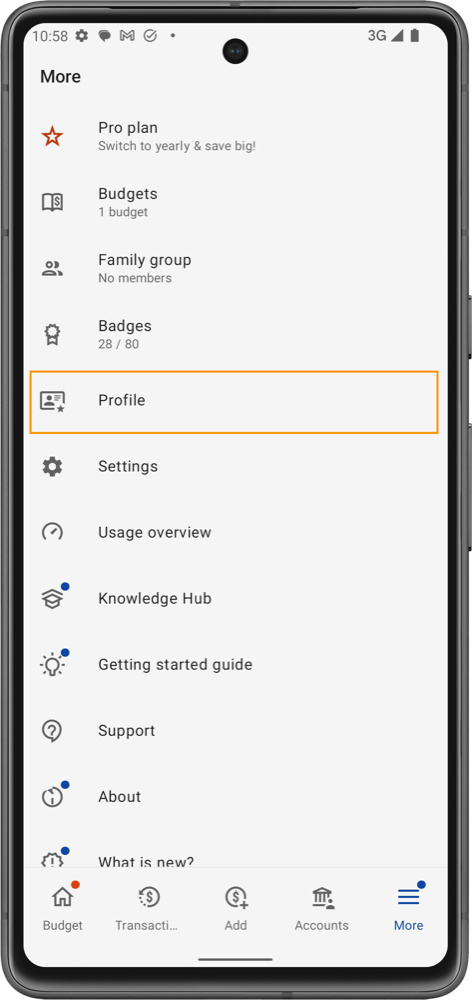
Step 1: Accessing the Profile Section
- Open the app.
- Tap on the More icon located at the bottom right of your screen.
- In the menu, select Profile to access your profile settings.
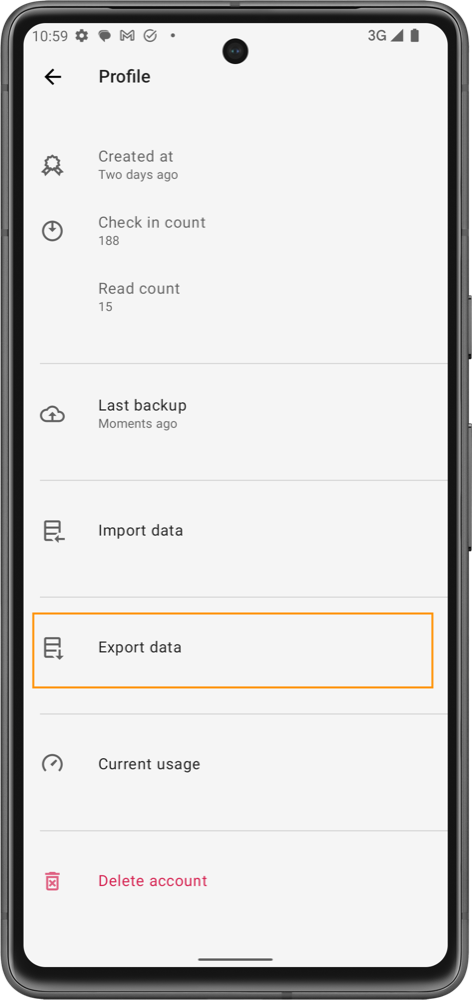
Step 2: Navigating to Export Data
- In the Profile section, scroll down and tap on Export data.
- You will be presented with several options to customize your export.
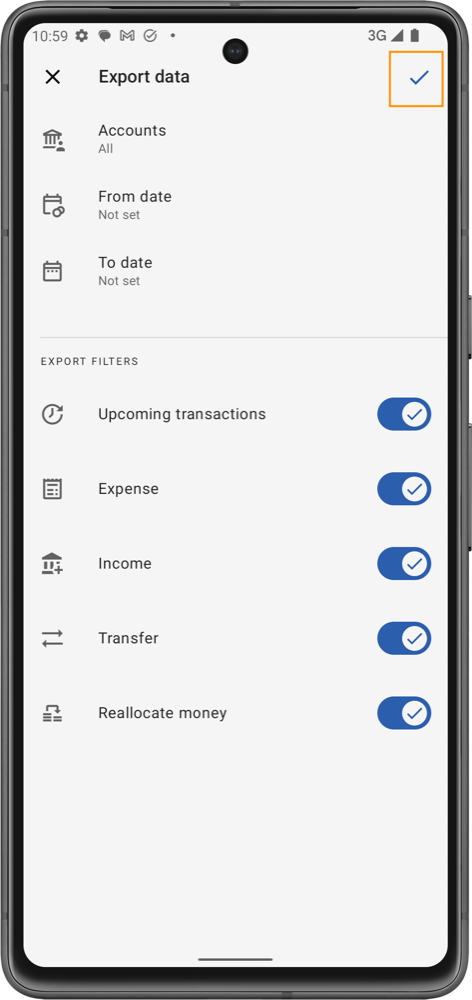
Step 3: Configuring Export Settings
- Accounts: Select the accounts you want to include in the export. By default, all accounts are included.
- From Date / To Date: If you want to export data for a specific period, set the start and end dates.
- Export Filters: Choose the types of data you want to export, such as:
- Upcoming transactions
- Expense
- Income
- Transfer
- Reallocate money
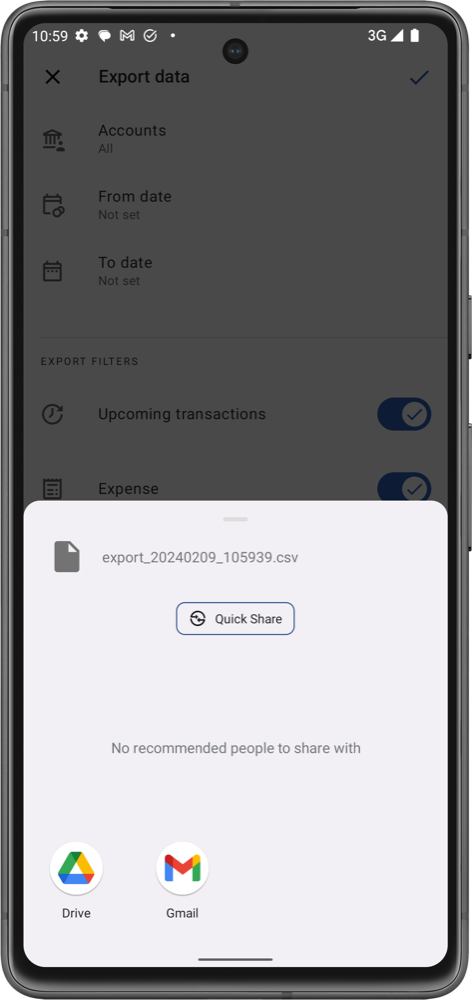
Step 4: Exporting and Sharing the Data
- Once you've configured your export settings, tap the checkmark at the top right corner of the screen to initiate the export.
- The app will generate a
.csvfile with your data. - You will then have options to share this file, such as through Drive or Gmail.
Step 5: Saving or Sharing the Exported File
- Choose your preferred method to save the file or share it directly. If you choose to save it to Drive, the file will be uploaded to your Google Drive. If you choose Gmail, the file will be attached to a new email.

This process ensures that you can always have a backup of your financial data or share it easily when needed.