CSV
Importing transactions through CSV files is a flexible and efficient way to get your financial data into the app. The app can automatically recognize column headings and map them to the corresponding fields, streamlining the process.
You can alternatively send the transaction file directly from your desktop to import@beyondbudget.net, and the app will automatically process and import the transactions for you. This is a convenient option if your files are stored on your computer.
Steps to Import Transactions via CSV:
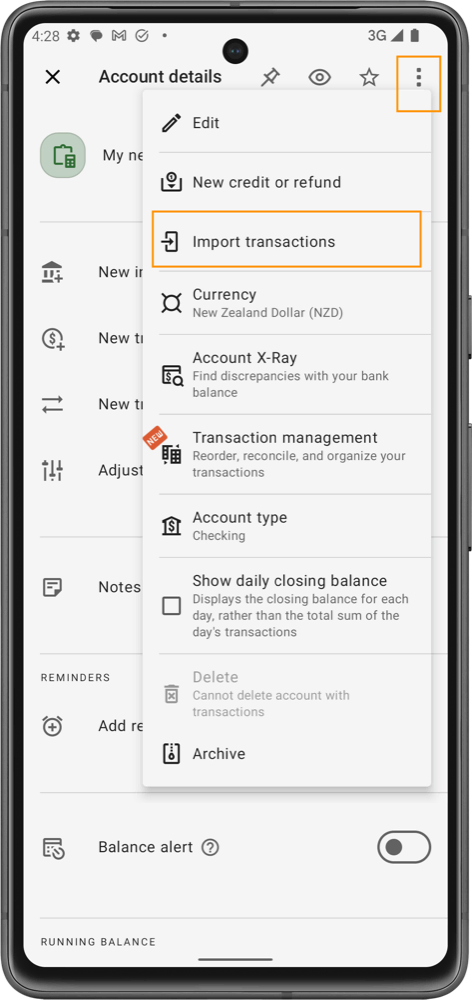
- Open the Account Details:
- Navigate to the Account Details screen and select the three-dot menu in the upper-right corner.
- Select "Import Transactions":
- From the dropdown menu, choose Import Transactions. In the import window, select the option to upload a CSV file.
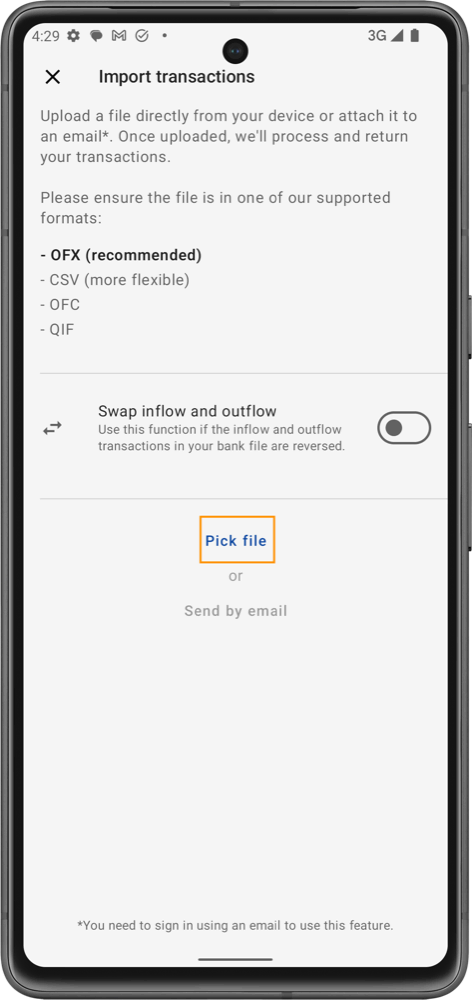
- Choose Your File:
- Click Pick File to upload your CSV file from your device, or choose to Send by Email. Ensure the file follows the correct formatting for smoother import.
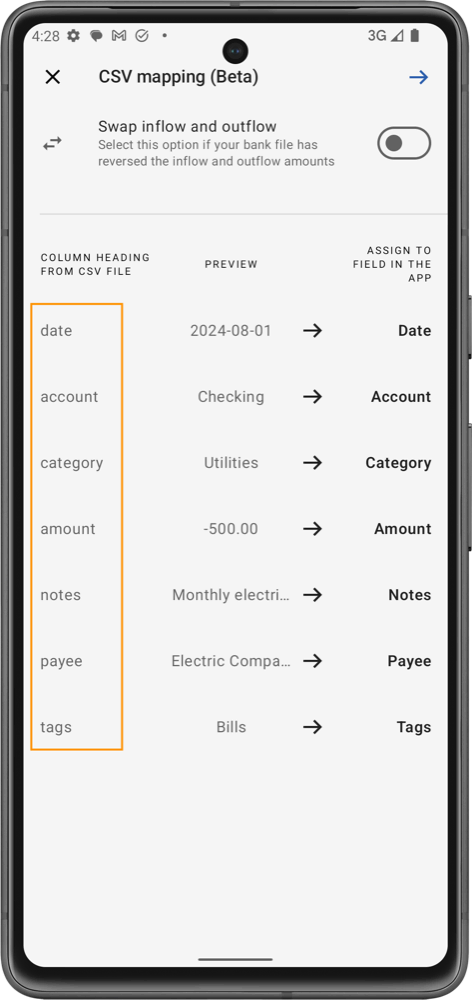
- CSV Mapping:
- After uploading the file, the app will assist you in mapping the column headings from your CSV file to the corresponding fields within the app.
- Example:
- Date: Maps to the transaction date.
- Account: Specifies the account the transaction belongs to.
- Category: Assigns the transaction to the relevant budget category.
- Amount: Represents the transaction amount (positive for income, negative for expenses).
- Notes: Additional details related to the transaction.
- Payee: Specifies who the transaction was with.
- Tags: Allows for additional categorization or grouping.
- The preview feature displays how the columns in your CSV file will be mapped to the app’s fields, giving you the chance to adjust mappings if necessary.
Common headers like date, account, category, amount, notes, payee, and tags will be automatically recognized and assigned to the correct fields.
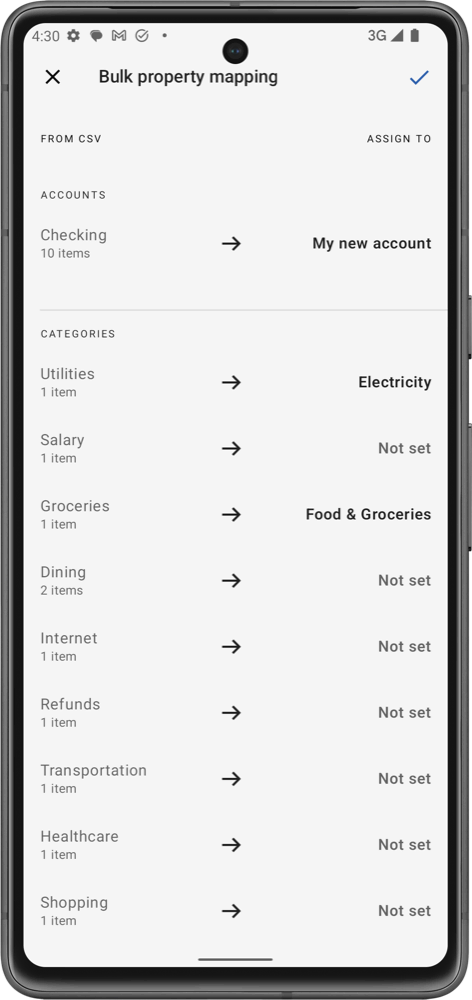
Bulk Property Mapping
The Bulk Property Mapping tool lets you quickly assign multiple transactions to the same account or category at once, reducing the time spent mapping individual fields.
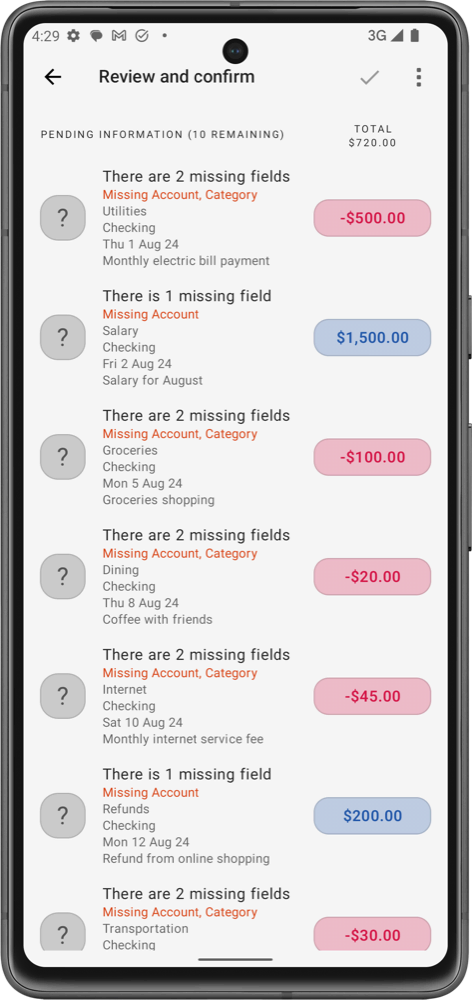
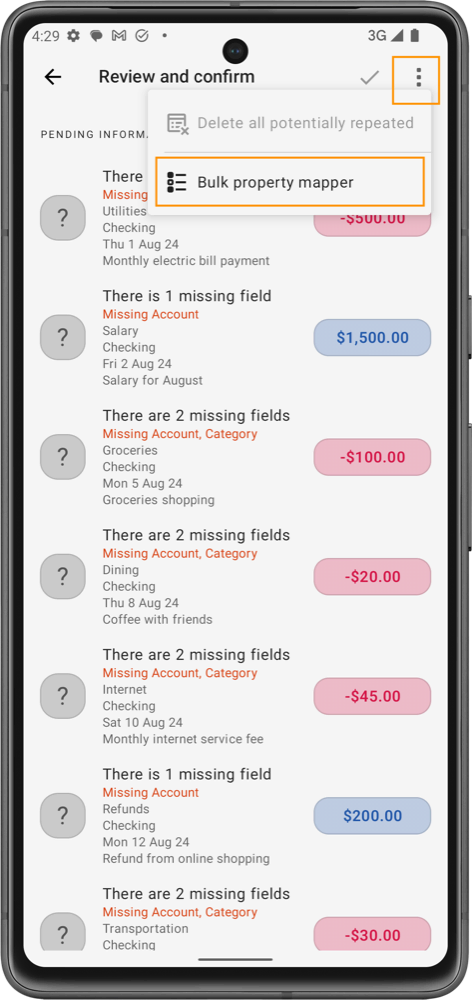
- Bulk Property Mapper:
- In the Review and Confirm screen, access the Bulk Property Mapper. This tool lets you map several transactions with the same account or category in one go.
- For instance, all transactions listed under Checking can be assigned to your "My New Account," or all transactions categorized under Groceries can be mapped to the Food & Groceries budget category.
- Review Mappings:
- Review all the mappings after using the bulk tool to ensure accuracy before finalizing.
- Confirm the Import:
- Once satisfied with the mappings, confirm the import by clicking the checkmark. Your transactions will be added to the app.
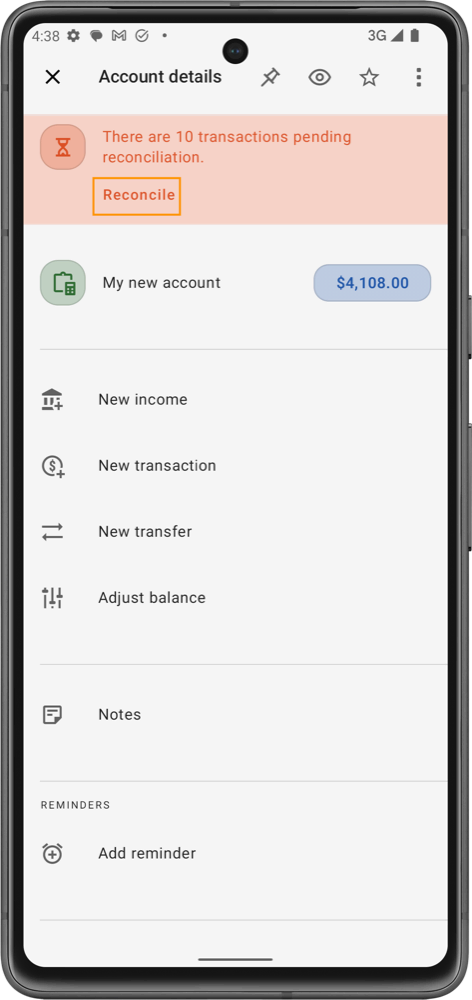
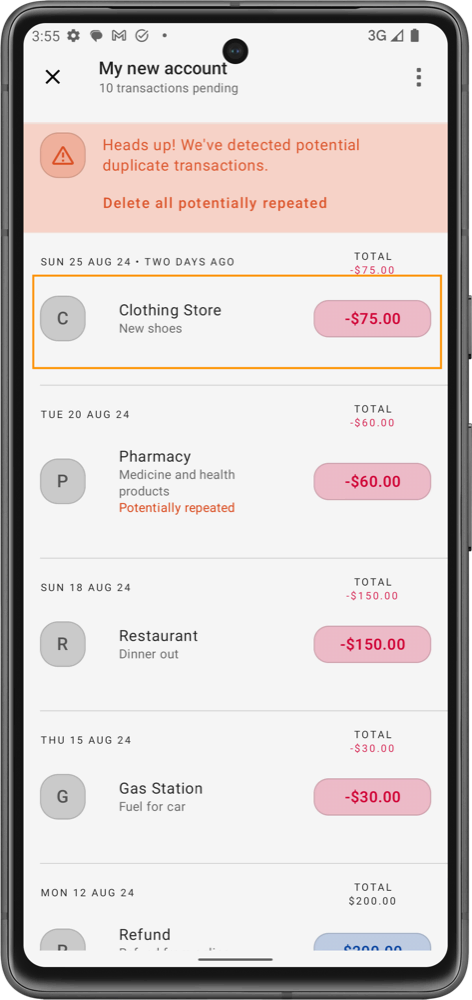
Post-Import Reconciliation
After importing the CSV file, the app will list all pending reconciliation transactions. These include transactions awaiting your review and potentially repeated transactions. You can reconcile them just as you would after importing OFX files. This step ensures that all transactions align correctly with your bank statements, helping you maintain accurate financial records.
Due to technical limitations with our real-time database, the time period for imported transactions is limited to 12 months, and each file can handle only a few hundred transactions. For larger datasets, consider splitting them into smaller files. We are working on improving this.